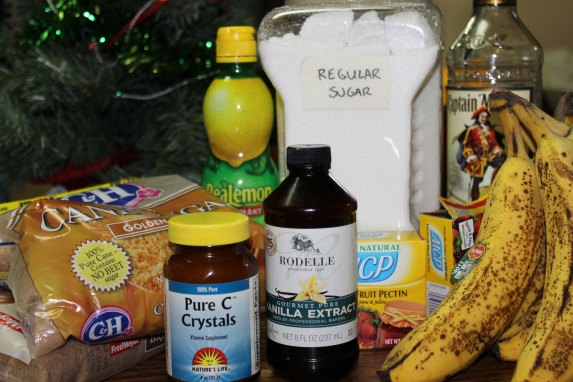
Stuff to make bananas foster jam–one of my new favorites!
A few days ago I managed to find a store selling bananas for 29 cents a pound. I figured I would buy several pounds and make up some banana jam. The bananas were finally getting nice and spotty today, perfect for making the jam I had in mind. The recipe I use I adapted from the recipe posted on Jammin From the Heart’s page.
As an added bonus, yesterday I got a brand new camera as a Christmas present from a very dear friend. So today’s post on jam making is mostly an excuse to try out my new camera, while showing y’all how to make one of my new favorite jams.
First things first. You need to get yourself a bunch of clean jars, lids, and rings. Take a giant pot and boil them to sterilize them. I forgot to take a picture of this stage, but it’s not too hard to visualize. You’ll need another giant pot to boil the jars of jam once they’re filled, too, especially if you are going to make more than one batch of jam at a time. Otherwise, I suppose you could just re-use the one big pot to boil the filled jars. Make sure that when you are boiling them that you have them completely covered with water, both when sterilizing and then when giving them the final water bath as well.
Most of the recipes I’ve read have said to make jam in single batches, rather than doubling the batches, because it changes the quality of the batch, and not always for the better.
On to making the jam.
First you need 3 3/4 cups of diced bananas.
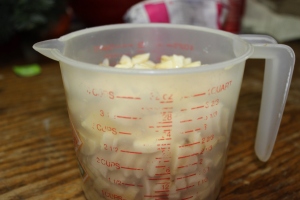
Whee! Diced bananas
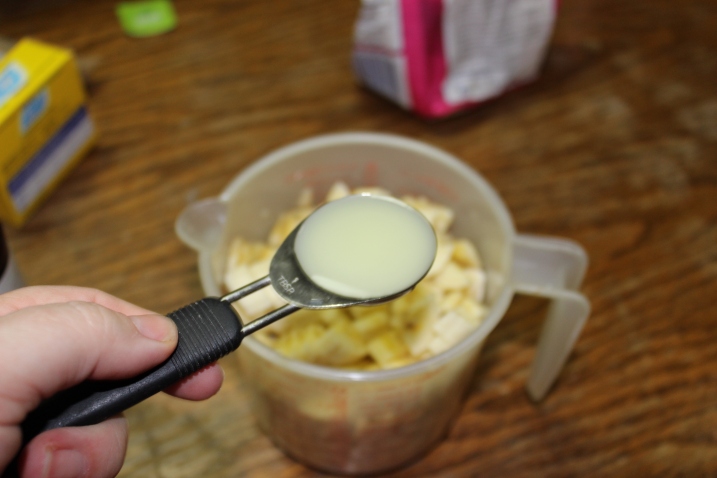
Then you add 6 tablespoons of lemon juice. I used ReaLemon, since I was out of lemons.
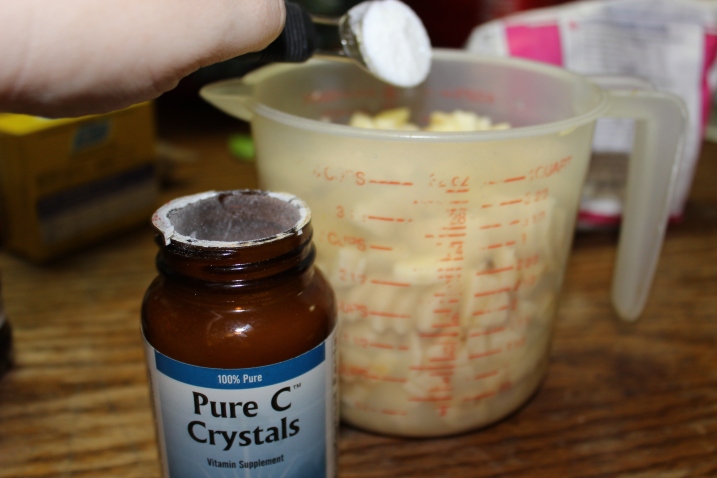
Add in one teaspoon of fruit fresh or ascorbic acid crystals. Ascorbic acid is vitamin C. It also adds to the acidity of the jam, which allows you to be able to can it in a water bath. If fruits or vegetables don’t have enough acid, then to can them, you need a pressure cooker. But this recipe is fine for the water bath method.
Dump them into a heavy tall sided pot (so you don’t have it bubble up, flow over and have a nasty, burned caramel banana mess to clean up). I burnt my first batch of jam (turned on the wrong burner by mistake intending to heat the jars’ water bath, and instead had the pot on and didn’t realize so dumped the bananas into the ultra hot pot, causing instant smoke and the fire alarm went off) and the black bottom of the pot is now the permanent new color of my my dad’s pot. Or at least I think it is. I couldn’t get the blackness off, even with steel wool. Anyhoo…on with the rest of the recipe, shall we? *whistling innocently*

Get the gooey melty banana thing going.
Now add three cups of granulated white sugar.

Dump in three of these.
And two cups of brown sugar. I don’t think it matters if it’s dark or light brown sugar. I used a mix, since I only had a cup and a half of the light stuff.

Mmmm…brown sugar. It makes this jam nice and caramelly.
Next add about 1/2 teaspoon of unsalted butter.

Everything’s better with butter!
Add one teaspoon of ground cinnamon.

Cimmannen. Mmm. Cinnemenem. I mean, mmm, cinnamon.
Bring to a nice rolling boil on medium high heat. Be sure to stir frequently so the banana mixture doesn’t stick to the bottom and burn. It should look something like the following.

Boiling bananas, Batman!
Once it’s boiling, add all of the contents of a packet of pectin. I used MCP, but you can use whatever brand you like best, as long as it isn’t the kind meant for no sugar jams.

I used powdered pectin.
Stir the gloop for continually for around two minutes. You want to make sure the pectin gets good and dissolved in the banana mixture. Once that’s done, you take the pot off the heat. Add in two teaspoons of rum extract.

Rum extract. You could probably use real rum, but that might make it a little more liquid-ey. If you’re wondering why the extract looks a weird color, it’s because what you’re seeing there is the cinnamon residue from earlier.
And two teaspoons of vanilla extract. The banana mixture is so hot that the alcohol in the extracts will boil off straight away.

Vanilla extract adds such richness!
Let the mixture cool for about five minutes, stirring every now and then to make sure the bananas don’t all settle to the bottom. Pour into the sterilized jars. Leave about 1/4 inch of headroom. Wipe the rims in case any blobs of goop got on the sides. That could interfere with the seal, so you want to make sure it’s all clean. Seal the jars and put them in the other giant pot of boiling water you have going (remember I said to have two–one for sterilizing them and one for the water bath when they are filled).

I got this nifty canning funnel this summer. I can judge at a glance if it’s over-filled.
Leave the jars in the boiling water bath for ten minutes. Then take them out and leave them on the counter to cool for a while. You should hear nice popping noises as the vacuum seals are forming. If you notice after several hours that some jars haven’t had the lid get sucked down (you shouldn’t be able to make the lid push down at all, it should be concave and not make a popping noise when you push it), make sure you put those jars in the fridge and use those up first. Don’t leave them out on the shelf. The other jars that had good seals can be stored in a cool dry place–like your cupboard–for several months, though I can guarantee you that this jam won’t last that long!
Voila! Jam that is super nummy. It seriously tastes like dessert in a jar. You can use it for regular jam, but it’s also really good warmed up and poured on ice cream. The ice cream becomes a sundae reminiscent of a banana split, minus the chocolate fudge.
I don’t recommend this jam for people on a renal dialysis diet. Bananas are a huge source of potassium. I got these bananas with the sole intent of making myself a nice little treat, since I don’t buy bananas often because of my husband’s restrictions. Now whenever I’m in the mood for some nice banana-ey flavor, I can break out a little jar any ol’ time of year.
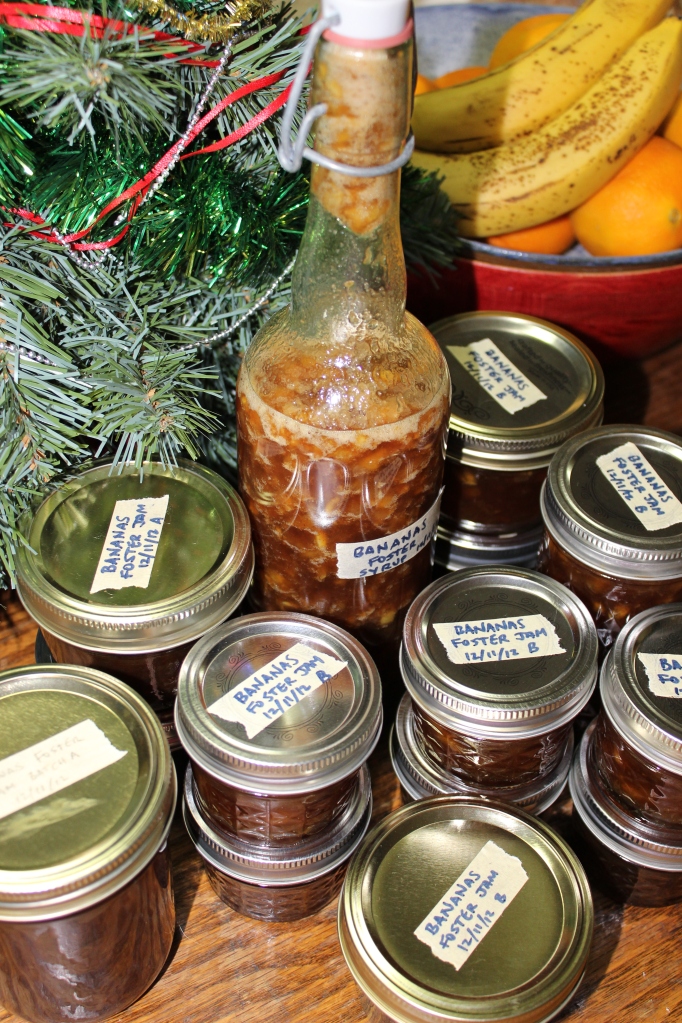
In the end, I made two batches of bananas foster jam, and despite burning the first one, it still came out delicious. It just tastes like a darker caramelized banana. I also made a batch of banana syrup. I was experimenting with that one completely. For it, I used the same recipe, except halved all the ingredients. I omitted the pectin (syrup needs to be syrup-ey, not jam-ey) and instead of using the rum extract, I used 1/4 cup of spiced dark rum. I figured the extra liquid wouldn’t hurt. We’ll see how it turns out when I make pancakes for breakfast.
If you ever try your hand at making this jam, let me know how it turns out for you!
Oh, and for those of you who want a quick list at a glance, the ingredients are:
- 3 3/4 cup diced bananas
- 6 tbsp lemon juice
- 1 tsp fruit fresh or ascorbic acid crystals
- 3 cups granulated sugar
- 2 cups brown sugar
- 1 tsp cinnamon
- 1/2 tsp butter
- 1 package fruit pectin
- 2 tsp rum extract
- 2 tsp vanilla extract
And that’s it! A single batch makes approximately seven 8 0z. jars, or any combo of other sizes that adds up to about 56 oz. You can see from my picture that I loaded up a number of different sized jars. Those little 4 oz size jars make for great gifts, too. That is, if you can part with this stuff. Once you try it, you’ll find it very difficult to give it away! 🙂
UPDATE: I tried the banana syrup on french toast and it was yummy. However, if you decide to make the syrup yourself, I suggest that if you put it in a bottle with a narrow mouth, make sure you dice the bananas into teeny pieces. I made pretty small dices (1/4-1/2″ approximately) and they were still big enough to clog the opening of the bottle. So be sure to mince the bananas–or even smoosh them–in order to make the syrup able to pour.

This looks so freaking awesome!!! I love your pictures and how you made so many pictures for each step! You are a good photographer, you should make a recipe blog!! I bet this would be yummmmmmy over ice cream! Ohh… bread pudding?
Thanks, Bethany! One blog is more than enough for me right now, lol. Maybe I’ll just throw in an occasional recipe for fun, eh?
But yes, I think you’re right. I bet this gooey concoction would be excellent with bread pudding!
Hi, Bethany from projectwhitespace sent me over. This recipe looks AMAZING. I will definitely be putting this on must make list. 🙂
Awesome! I’m sure you’ll love it. It’s also a great one to use when your bananas are starting to get too ripe and you don’t really want to eat them because they are too soft, so your bananas don’t go to waste.
That looks nummy — thanks for sharing!
A trick to get your pot clean: Pour an inch or two of hydrogen peroxide into your pot; cover and bring it to a simmer. Let it simmer for a couple of minutes and cool completely, keeping it covered (it isn’t the best smelling process). Scrape the bottom of the pan, and the burned-on stuff should lift off. Depending on how much is there you may need to do it a couple of times.
You’re welcome! Is the peroxide thing just for removing stubborn burnt on food or is that for removing stains to the metal? Because this is the metal that is stained. I managed to get all the food off with steel wool.
My dad brought out some metal polish earlier. We’ve been polishing it up, but it is a tedious process.
OMG that stuff looks AMAZING!
Thanks! It IS! (Not to toot my own horn or anything. Toot toot.)
Wonderful job! and thank you for writing: ” don’t recommend this jam for people on a renal dialysis diet. ” because many cooks would not know this. I enjoyed reading the posting even if I can’t consume it. You made it fun.
Thanks!
I figured, since people who follow my blog know my husband is on dialysis, I don’t want them thinking that I’m making this for him necessarily, because then they might think this sort of thing is okay for people on dialysis. It’s not.
But for the caregivers, who often end up changing our own diets because of the people we care for, well, sometimes it’s nice to have a little guilty pleasure! 🙂
YUM!